Hope you all are doing fine. I was searching and reading something about environment variables of maya and then i spotted using maya through external interpreter, I was like wait, forget about external interpreter, how to use maya cmds outside of maya script editor, this was an old bucket list task. So i decided to do this and realized, SHIT! this is a tedious task only because of maya docs – has no information at all.
But the maya community is just amazing, alot of people have uploaded amazing blog posts. You can read it in the helpful links section.
Gumroad – bloody can’t even find my own tool, forget it and very complicated. If anyone interested to help me ping me in the comments.
Free Version
Controller storage FREE version sold 45 times From July 2020 to September 2022 , thanks to all of the people those who have tried it.
Paid Version
The paid version did not sell at all, 2$ for a tool was an expensive deal lol.
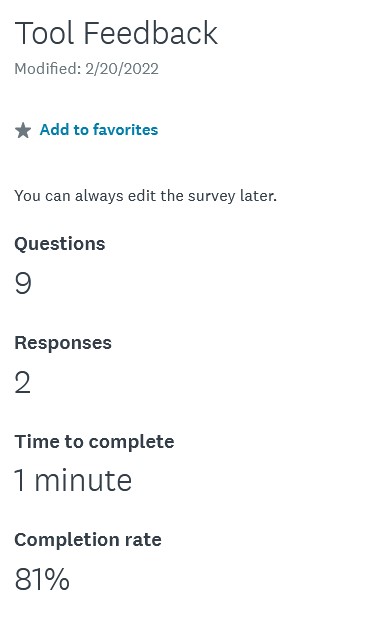
I did a Survey from the people/artists who purchased the free version, to understand the requirements and if they will pay for the tool or not, I got tremendous amount of feedback – 2 🤣.
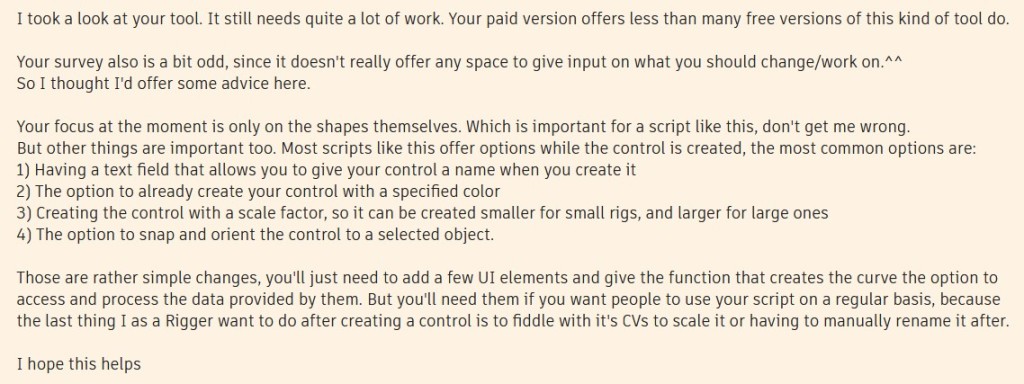
I was seeking for some answers to improve, so i came across Autodesk forums – And I received really good constructive criticism – and I know people are not going to click to the link 😁 – so below is the message
from Today onwards I have made the updated tool free as well.
Analysis
So as per me the tool is a hit, I was not expecting more than 1 person(that is me)to use it. Experiment of keeping the paid product in the market helped me understand certain things, eg: asking questions, survey’s, updates, at what point one should make tools paid, etc. These are few of them I need to work on from next time. Hopefully I’ll come with a better update for the tool next time, lets see 😄.
I was setting up userSetup the mel edition in my company and I instantly realized it was not a trivial task. And the below video covers most of the heavy duty, please check it out.
Since the world has moved on to Python, we should have an example of python as well. Maya docs was kind enough for not giving any info on either of them(Well you’ll get my rant once you watch the above video lol).
to check the path from userSetup.mel is being executed
whatIs userSetup.mel
// Result: Script found in: C:/Users/ADMIN/OneDrive/Documents/maya/2020/scripts/userSetup.mel //
whatIs command wont help in finding userSetup.py
#command can help you find yours scripts directory
print cmds.internalVar(userAppDir=True)

#save below script in userSetup.py to the path that you get from above command.
import maya.cmds as cmds
def dosomething():
    cmds.grid(spacing=100)
cmds.evalDeferred('dosomething()')
print("this is a test")
Dcc used to execute the tasksHeads and Cubes in Unreal for RTSReferenceBrevity Resources
Dcc used to execute the tasks
Maya2020, Unreal 4.26.2
Plugins: Perforce VCS-P4V, P4GT for Maya, Unreal 3dTextBeta
Brief Context
Maya is a 3d software I used to create cubes Intentionally
Unreal for testing the camera distance for each character height
Perforce – P4V – version control system for home work or if one wants to share depot with multiple artists(haven’t tried yet ) is by far one of the amazing tool.
P4GT for Maya is from P4V family, will help you save your increments in the depot
how to create 8heads in maya for reference create 7ft cube in maya to create 7ft cube– change the unit setup in maya to foot, adjust 7ft height in cube settings.(or directly convert foot to cm from google) change back the maya unit setup to cm now the foot has changed to cm in cube settings to get the sphere radius from 7ft — divide the cm by 2 — 7ft = 213.36cm 213.36cm/2 = 106.68cm apply 106.68cm in the sphere radius(this is a base value, after this divide by 8) for 8 spheres — 106.68cm/8 =13.335 increase the cube height subdivisions to 8
For technical details you can read the above docs, it covers a lot of things except the approach to execute the whole process.
Why do we need this process?
This process bakes your images to a binarydata.py and you can use the binarydata.py in the ui base class (a file that one converts from ui to py using uic)instead of using a folder path to load the image. This is a very neat approach.
Requirements
Autodesk Maya(not necessary)
PySide2/PyQt5
Qtdesigner/designer
Windows
So the cool part
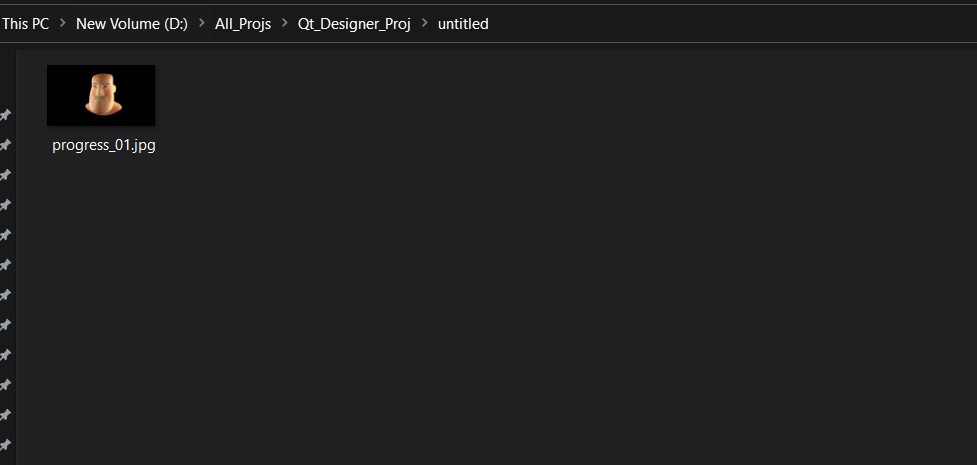
Create a new_folder in any drives
copy your images in the new_folder
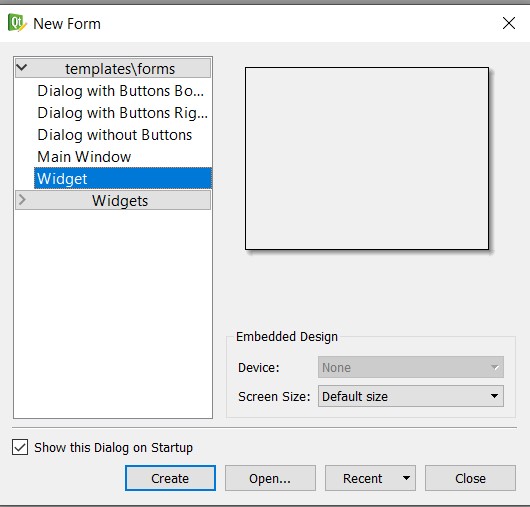
open designer/qtdesigner
create widget
Create label/drag and drop label in the widget
in the property_editor filter pixmap
Select the pencil in the Resource Browser
right click in the right hand side
create a new.qrc file in the new_folder
in the left hand side create a new prefix
below in the lhs panel there are three button select the add files(middle button)
select the image you pasted earlier in the new_folder
double click the pixmap and got to corner “…”(three dots)
select the resources and the image and the image will be displayed
avoid giving test names to any files, as the editors recognize it as a test module and creates name conflicts
great part 1 is done
now its time to convert the .qrc to .py
Please read carefully from here on wards, everything gets messy
open a terminal/command prompt/powershell
drag “C:\Program Files\Autodesk\<maya_version>\bin\rcc.exe” <file_path>/file.qrc -o <file_path>/file.py — there is a chance it might convert to c++ version, check the .py file that the above command line creates
if maya rcc.exe behaves unusual by giving you c++ output, You’ll need PySide2
maya is not the only one who behaves unusual python too — PySide2 Requires: Python >=2.7, !=3.0.*, !=3.1.*, !=3.2.*, !=3.3.*, !=3.4.*, <3.10 (it means more than 3.5 smaller or equal to 2.7)
so that is a trouble, please then install python 3.8(even though it tells 2.7 please avoid, its troublesome)
python -m pip install PySide2 (later you can uninstall it)
below are the alternatives in case you face any errors, always check the “–help” of the command line
# Resource object code (Python 2)
# Created by: object code
# Created by: The Resource Compiler for Qt version 5.15.0
# WARNING! All changes made in this file will be lost!

from PySide2 import QtCore

qt_resource_data = "\
\x00\x00\xcf\x14\
\xff\
\xd8\xff\xe0\x00\x10JFIF\x00\x01\x01\x00\x00\x00\x00\
\x00\x00\x00\xff\xe1\x00\x16Exif\x00\x00II*\
\x00\x08\x00\x00\x00\x00\x00\x00\x00\x00\x00\xff\xdb\x00C\x00\
\x01\x01\x01\x01\x01\x01\x01\x01\x01\x01\x01\x01\x01\x01\x01\x02\
\x01\x01\x01\x01\x01\x02\x01\x01\x01\x02\x02\x02\x02\x02\x02\x02\
\x02\x02\x03\x03\x04\x03\x03\x03\x03\x03\x02\x02\x03\x04\x03\x03\
\x04\x04\x04\x04\x04\x02\x03\x05\x05\x04\x04\x05\x04\x04\x04\x04\
\xff\xdb\x00C\x01\x01\x01\x01\x01\x01\x01\x02\x01\x01\x02\x04\
\x03\x02\x03\x04\x04\x04\x04\x04\x04\x04\x04\x04\x04\x04\x04\x04\
\x04\x04\x04\x04\x04\x04\x04\x04\x04\x04\x04\x04\x04\x04\x04\x04\
\x04\x04\x04\x04\x04\x04\x04\x04\x04\x04\x04\x04\x04\x04\x04\x04\
\x04\x04\x04\x04\x04\xff\xc0\x00\x11\x08\x02\x1c\x03\xc0\x03\x01\
\x22\x00\x02\x11\x01\x03\x11\x01\xff\xc4\x00\x1f\x00\x00\x01\x05\
\x01\x01\x01\x01\x01\x01\x00\x00\x00\x00\x00\x00\x00\x00\x01\x02\
\x03\x04\x05\x06\x07\x08\x09\x0a\x0b\xff\xc4\x00\xb5\x10\x00\x02\
\x01\x03\x03\x02\x04\x03\x05\x05\x04\x04\x00\x00\x01}\x01\x02\
\x03\x00\x04\x11\x05\x12!1A\x06\x13Qa\x07\x22q\
\x142\x81\x91\xa1\x08#B\xb1\xc1\x15R\xd1\xf0$3\
br\x82\x09\x0a\x16\x17\x18\x19\x1a%&'()*\
and open the .py file and edit the PyQt4 to PySide2, as you can see below.
# -*- coding: utf-8 -*-

# Resource object code
#
# Created: Fri 17. Sep 22:43:20 2021
#      by: The Resource Compiler for PyQt (Qt v4.8.4)
#
# WARNING! All changes made in this file will be lost!

from PySide2 import QtCore
The output
below code is a an example of maya. I am not using an image path as you can see it is a resource. When you use a class you can keep your rcc file in the package folder and just import that and provide your qrc file prefix and you are good to go.