Hello Guys,
When we start new, we explore a lot and land up with a technique that works for us.
But that does not mean it is one of the most efficient technique, this post is about one of those, that i got to learn from Qt forum guys.
Resource Compiler/Qt Resource System to store images
Verbose stuff
https://doc.qt.io/qtforpython/overviews/resources.html
For technical details you can read the above docs, it covers a lot of things except the approach to execute the whole process.
Why do we need this process?
This process bakes your images to a binarydata.py and you can use the binarydata.py in the ui base class (a file that one converts from ui to py using uic)instead of using a folder path to load the image. This is a very neat approach.
Requirements
- Autodesk Maya(not necessary)
- PySide2/PyQt5
- Qtdesigner/designer
- Windows
So the cool part
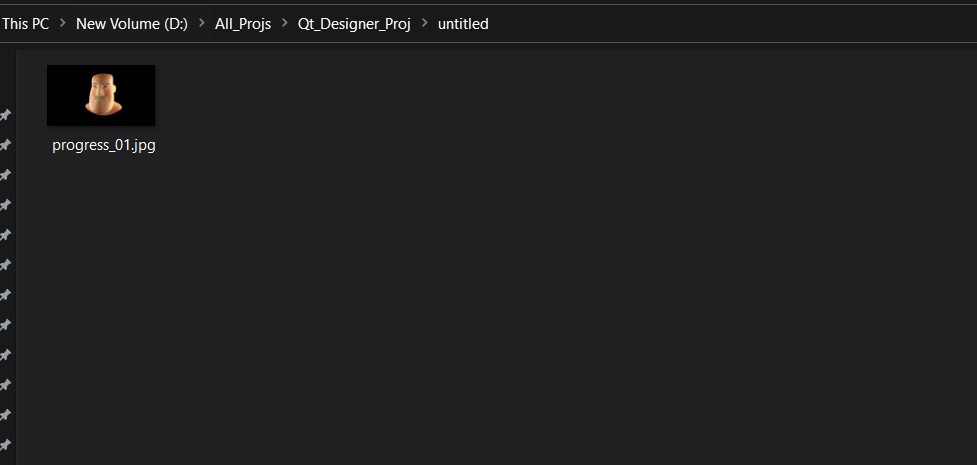
- Create a new_folder in any drives
- copy your images in the new_folder
- open designer/qtdesigner
- create widget
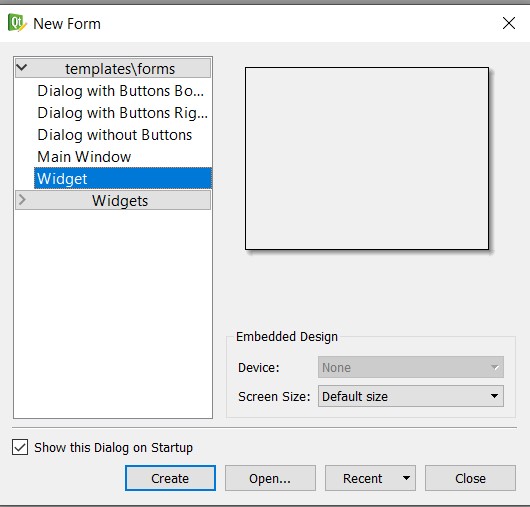
- Create label/drag and drop label in the widget
- in the property_editor filter pixmap

- Select the pencil in the Resource Browser
- right click in the right hand side
- create a new .qrc file in the new_folder
- in the left hand side create a new prefix
- below in the lhs panel there are three button select the add files(middle button)
- select the image you pasted earlier in the new_folder
- double click the pixmap and got to corner “…”(three dots)
- select the resources and the image and the image will be displayed
- avoid giving test names to any files, as the editors recognize it as a test module and creates name conflicts
- great part 1 is done

now its time to convert the .qrc to .py
Please read carefully from here on wards, everything gets messy
- open a terminal/command prompt/powershell
- drag “C:\Program Files\Autodesk\<maya_version>\bin\rcc.exe” <file_path>/file.qrc -o <file_path>/file.py — there is a chance it might convert to c++ version, check the .py file that the above command line creates
- if maya rcc.exe behaves unusual by giving you c++ output, You’ll need PySide2
- maya is not the only one who behaves unusual python too — PySide2 Requires: Python >=2.7, !=3.0.*, !=3.1.*, !=3.2.*, !=3.3.*, !=3.4.*, <3.10 (it means
more than 3.5smaller or equal to 2.7) - so that is a trouble, please then install python 3.8(even though it tells 2.7 please avoid, its troublesome)
- python -m pip install PySide2 (later you can uninstall it)
- below are the alternatives in case you face any errors, always check the “–help” of the command line
- C:\Python38\Lib\site-packages\PySide2\rcc.exe -g python2 <file_path>/file.qrc -o <file_path>/file.py
- C:\Python38\Scripts\pyrcc5.exe
- C:\Python27\Lib\site-packages\PyQt4\pyrcc4.exe
# Resource object code (Python 2)
# Created by: object code
# Created by: The Resource Compiler for Qt version 5.15.0
# WARNING! All changes made in this file will be lost!

from PySide2 import QtCore

qt_resource_data = "\
\x00\x00\xcf\x14\
\xff\
\xd8\xff\xe0\x00\x10JFIF\x00\x01\x01\x00\x00\x00\x00\
\x00\x00\x00\xff\xe1\x00\x16Exif\x00\x00II*\
\x00\x08\x00\x00\x00\x00\x00\x00\x00\x00\x00\xff\xdb\x00C\x00\
\x01\x01\x01\x01\x01\x01\x01\x01\x01\x01\x01\x01\x01\x01\x01\x02\
\x01\x01\x01\x01\x01\x02\x01\x01\x01\x02\x02\x02\x02\x02\x02\x02\
\x02\x02\x03\x03\x04\x03\x03\x03\x03\x03\x02\x02\x03\x04\x03\x03\
\x04\x04\x04\x04\x04\x02\x03\x05\x05\x04\x04\x05\x04\x04\x04\x04\
\xff\xdb\x00C\x01\x01\x01\x01\x01\x01\x01\x02\x01\x01\x02\x04\
\x03\x02\x03\x04\x04\x04\x04\x04\x04\x04\x04\x04\x04\x04\x04\x04\
\x04\x04\x04\x04\x04\x04\x04\x04\x04\x04\x04\x04\x04\x04\x04\x04\
\x04\x04\x04\x04\x04\x04\x04\x04\x04\x04\x04\x04\x04\x04\x04\x04\
\x04\x04\x04\x04\x04\xff\xc0\x00\x11\x08\x02\x1c\x03\xc0\x03\x01\
\x22\x00\x02\x11\x01\x03\x11\x01\xff\xc4\x00\x1f\x00\x00\x01\x05\
\x01\x01\x01\x01\x01\x01\x00\x00\x00\x00\x00\x00\x00\x00\x01\x02\
\x03\x04\x05\x06\x07\x08\x09\x0a\x0b\xff\xc4\x00\xb5\x10\x00\x02\
\x01\x03\x03\x02\x04\x03\x05\x05\x04\x04\x00\x00\x01}\x01\x02\
\x03\x00\x04\x11\x05\x12!1A\x06\x13Qa\x07\x22q\
\x142\x81\x91\xa1\x08#B\xb1\xc1\x15R\xd1\xf0$3\
br\x82\x09\x0a\x16\x17\x18\x19\x1a%&'()*\
What works for me
I convert it through
C:\Python27\Lib\site-packages\PyQt4\pyrcc4.exe -py2 <file_path>\head_banner.qrc -o <file_path>\head_banner.py
and open the .py file and edit the PyQt4 to PySide2, as you can see below.
# -*- coding: utf-8 -*-

# Resource object code
#
# Created: Fri 17. Sep 22:43:20 2021
#      by: The Resource Compiler for PyQt (Qt v4.8.4)
#
# WARNING! All changes made in this file will be lost!

from PySide2 import QtCore
The output
below code is a an example of maya. I am not using an image path as you can see it is a resource. When you use a class you can keep your rcc file in the package folder and just import that and provide your qrc file prefix and you are good to go.
from PySide2 import QtWidgets
from PySide2 import QtGui
import sys
#sys.path.append('D:\\All_Projs\\Qt_Designer_Proj\\untitled')
import head_banner#rcc
#reload(head_banner)

def label():
    win_wid = QtWidgets.QWidget()
    label = QtWidgets.QLabel()
    image_pixmap = QtGui.QPixmap(":/head/progress_01.jpg")
    label.setPixmap(image_pixmap)
    layout = QtWidgets.QVBoxLayout()
    layout.addWidget(label)
    win_wid.setLayout(layout)
    win_wid.resize(200, 50)

    return win_wid

trial = label()
trial.show()
Try it out guys.
Take care bye!!