I was setting up userSetup the mel edition in my company and I instantly realized it was not a trivial task. And the below video covers most of the heavy duty, please check it out.
Since the world has moved on to Python, we should have an example of python as well. Maya docs was kind enough for not giving any info on either of them(Well you’ll get my rant once you watch the above video lol).
to check the path from userSetup.mel is being executed
whatIs userSetup.mel
// Result: Script found in: C:/Users/ADMIN/OneDrive/Documents/maya/2020/scripts/userSetup.mel //
whatIs command wont help in finding userSetup.py
#command can help you find yours scripts directory
print cmds.internalVar(userAppDir=True)

#save below script in userSetup.py to the path that you get from above command.
import maya.cmds as cmds
def dosomething():
    cmds.grid(spacing=100)
cmds.evalDeferred('dosomething()')
print("this is a test")
Dcc used to execute the tasksHeads and Cubes in Unreal for RTSReferenceBrevity Resources
Dcc used to execute the tasks
Maya2020, Unreal 4.26.2
Plugins: Perforce VCS-P4V, P4GT for Maya, Unreal 3dTextBeta
Brief Context
Maya is a 3d software I used to create cubes Intentionally
Unreal for testing the camera distance for each character height
Perforce – P4V – version control system for home work or if one wants to share depot with multiple artists(haven’t tried yet ) is by far one of the amazing tool.
P4GT for Maya is from P4V family, will help you save your increments in the depot
how to create 8heads in maya for reference create 7ft cube in maya to create 7ft cube– change the unit setup in maya to foot, adjust 7ft height in cube settings.(or directly convert foot to cm from google) change back the maya unit setup to cm now the foot has changed to cm in cube settings to get the sphere radius from 7ft — divide the cm by 2 — 7ft = 213.36cm 213.36cm/2 = 106.68cm apply 106.68cm in the sphere radius(this is a base value, after this divide by 8) for 8 spheres — 106.68cm/8 =13.335 increase the cube height subdivisions to 8
Today we’ll install Perforce and setup Azure for home use!!. This is just a test setup to understand the process, even I don’t know most of terminologies but lets learn. Please don’t do it blindly I request, as I have updated the page while I was attempting the installation(multiple times, don’t rely on images). Please read all the notes. All the best. cheers!!
Table of Contents
P4D
P4ROOT
Disk Allocation
Install Perforce P4V
Perforce SSL Setup
P4VInitiating
Microsoft Azure
Azure CLI
Resource GroupCLI
Virtual Network CLI
Some Doubts(verbose)
Credentials
Resources
Install Perforce P4D
(directly from website)
What is Helix Core (P4D) Server?
Helix Core (P4D) is version control for accelerated development. It securely versions all digital content – even large files – in a single repository. And it scales for large teams, handles thousands of daily transactions, and delivers files quickly to remote users.
Open up a Windows command prompt by right-clicking on the Windows Command Prompt icon and selecting “Run as”; select “Administrator”. “Run as”; select “Administrator”
Ensure this directory is accessible by the user who runs the Perforce service:
(note: Please put double inverted commas )
p4 set P4SSLDIR="C:\SSLKEYS"
p4d -Gc
p4 set -S Perforce P4SSLDIR="C:\SSLKEYS"
p4 set -S Perforce P4PORT=ssl::1666
p4 -p 1666 admin stop
net start perforce
p4 set P4PORT=ssl:localhost:1666
p4 info
look for Server encryption: encrypted in the info
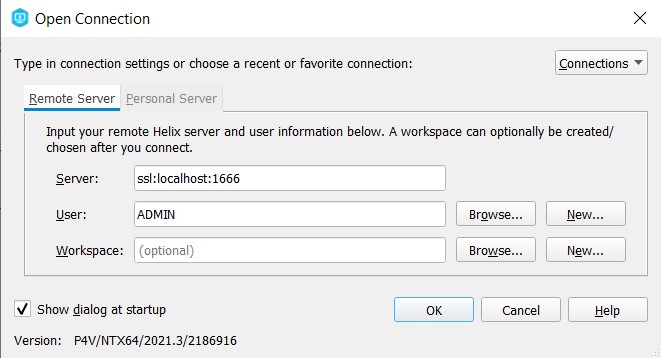
P4VInitiating
Server- ssl:localhost:1666 User Name- ADMIN (it should be same as P4D)
OK the above dialog box.
This is where it gets more dirty
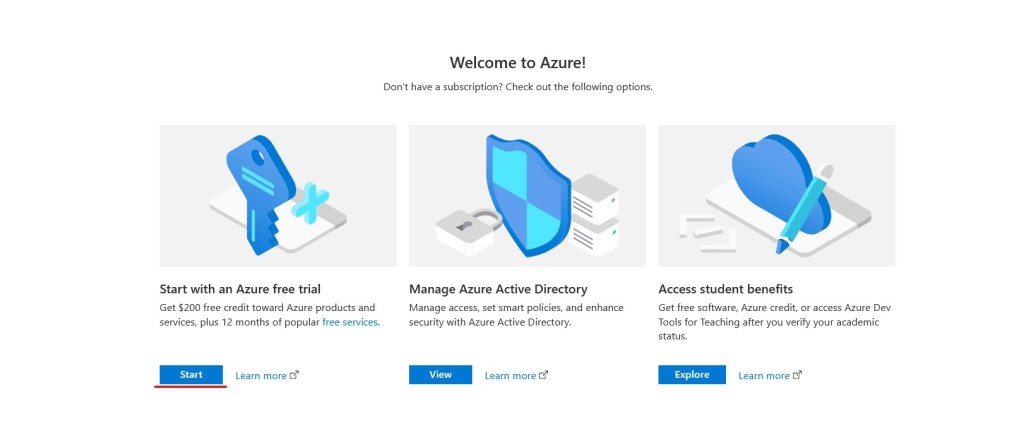
Microsoft Azure
At its core, Azure is a public cloud computing platform.
Microsoft Azure is a cloud platform for storing your work, you need a pack to let your perforce account recognize and sync your work to cloud.
One will receive a mail once you mention your mail id in the perforce page(download and install p4d and p4v)
You’ll have to pick a subscription it is mandatory. Please choose as per your requirement or if you are a student go for student benefits. For list of active products with subscriptions please read below page. Its a good reference page.
Subscription page will be displayed fill in your details its quite simple and you’ll receive 200$ roughly Rs.14000+ depending on the currency rate at the time.(just a heads up any one using HDFC debit card check if your name is mentioned on the card if not, please prefer another card). No need to worry even if the subscription is collecting your details upfront, you’ll be prompted later if you want to upgrade with payment, it wont auto deduct from your account. cheers!!(unfortunately i did not take snaps of the subscription page) for more details https://docs.microsoft.com/en-us/azure/cost-management-billing/manage/avoid-charges-free-account
for perforce enhanced studio pack please name the resource group as
perforce-vcs-development
(Note: when you are logging in freshly second time, go to your profile symbol top right corner, click once and you’ll find Azure Portal, that is how you can go to the portal page of Azure)
Download Azure CLI
From here onwards I’ll be logging in through CLI(command line). I have few reasons.
Since i have been working in Linux for a while, I feel really comfortable in CLI(plus it looks cool if somebody is watching, lol). Azure CLI is same as the Website interface. Whatever details I’ll show you through CLI those exact details can be filled on the Website. Don’t Worry if something goes wrong, you can delete anytime you want. For people those who are not a CLI fans or inexperienced for them I’ll link the page where Azure docs have explained with Website Slides in docs. ALL THE BEST. Here it comes.
Download from the above link. It will be installed in C drive for windows 10 users by default(that sucks).
you can login in azure through command line()
az login
(Note: If you use a cloud shell, it will create a resourcegroup, read about it(resource group))
Resource GroupCLI
A resource group is a container that holds related resources for an Azure solution — VNet enables many types of Azure resources, such as Azure Virtual Machines (VM)
You can skip creating tags and create it. If you have reached till here be kind to your body and drink some water.
CLI
az group create --name perforce-prod-dev --location centralindia
# to delete
az group delete --name perforce-prod-dev
Virtual NetworkCLI
Azure Virtual Network (VNet) is the fundamental building block for your private network in Azure to understand the network block please see the image on this link
(Not an expert on this, but i have used while exploring git(it is a one time thing), always had a love-hate relation with it. But perforce has asked it so I’ll do it. SSH helps you communicate between remote servers)
An SSH key is an access credential for the SSH (secure shell) network protocol. This authenticated and encrypted secure network protocol is used for remote communication between machines on an unsecured open network. SSH is used for remote file transfer, network management, and remote operating system access.
Once you complete the creation you’ll notice below image
Since i did not do all the above steps in a single day, I created and deployed the perforce-studio-pack at later stage(In case you don’t have the studio pack, please go to Microsoft Azure studio pack part above in the page). What I mean there is no hard and fast rule to deploy this pack. just for the record.
for perforce enhanced studio pack please name the resource group as
perforce-vcs-development
If you have reached till here give yourself a pat on the back. take a break drink some tea or coffee.
lets go ahead
Credentials
Everything is explained very well in the below link
Connect to server failed; check $P4PORT. connect: public or pirvate IP:1666: WSAETIMEDOUT, A connection attempt failed because the connected party did not properly respond after a period of time, or established connection failed because connected host has failed to respond.
Azure virtual machines and if you notice i did not take location-central india, as the machines were not available in that part of the country. So choose wisely.
Select First Machine
Select Networking
Check the Source Column
There might be something 1.1.1.1/32, This needs to be updated to your ip address.
I wanted to show a bit more about the perforce workspaces and depot but unfortunately I ran out of credits. Probably I’ll write perforce post independently. I have learnt a lot through this setup. You’ll have creative freedom for your work. Stop saving your file in an old fashioned way. Try the perforce way. Give it a try its worth it.
Configure Less. Create More. — Perforce.
Resources
Best Practice, it might show you to fill a form, please do it and go ahead it is a good read.
In India we are a tad bit confused when it comes to beginning the work or executing the task.
oh wait it meant
mc escher
we don’t know from where to begin.
So the first step is to save your work in dir, with valid details.
Purpose – My Proj
Why do you need conventions to organize your work?
my proj(still months away from executing)
Guys i am working on a proj for myself like i did with controller storage. so the files I created needs to be structured and organized.
Because i am not going to be working on just 5 or 10 files, there are going to be files, folders, stages, references, output, and i cannot keep naming them final_output, final_output2,………… I don’t want to remain confused like my fellows in the above gif.
So Lets for once and for all create a folder structure and move on with life.(i am not sure if that will happen lol)
So i stumbled across this guys blog for creating a folder structure for reference.
While i was creating particle effect i got exposed to alot of parameters in unreal engine one of them was creating a shader(flipbook) you’ll come to know in below mentioned series.
Check out the below mentioned series by Ben Cloward, amazing tutorials worth watching for any aspiring shader artist.
I actully wanted to share and save the process for people interested in shader development(me too),
kindly watch the above video first and then begin the process of creating a SHADER for yourself,
You’ll require couple of things first Ben above explains he createad a model for showing workflow in unreal But there was no downloadable content for working, So i saw an opportunity and thought of creating it for myself and people who are interested, so the things that we need are,(these below points are shorcuts for people who are not modeling artists like me)
any sculpting software(mudbox, zbrus, etc)
any dcc software(maya, 3ds max, etc)
crazy bump(most crucial step)
unreal 4.24
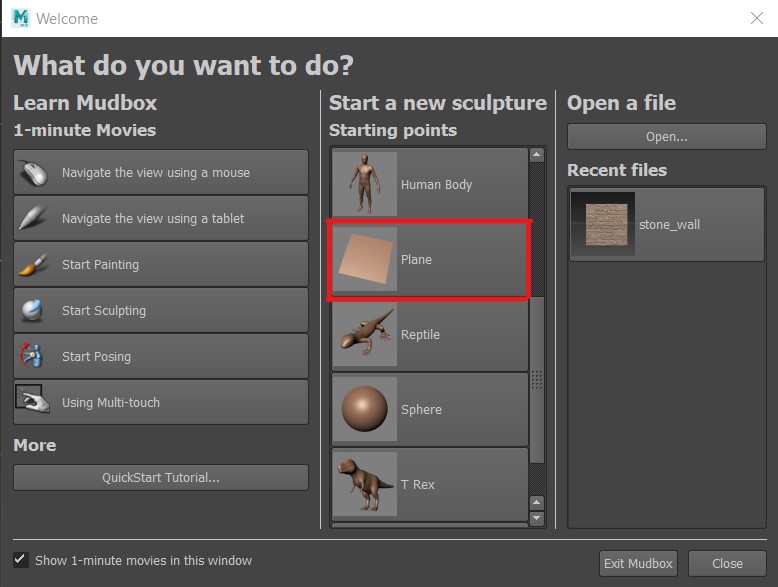
Open Mudbox with plane
rotate plane to z-axis – 90degrees
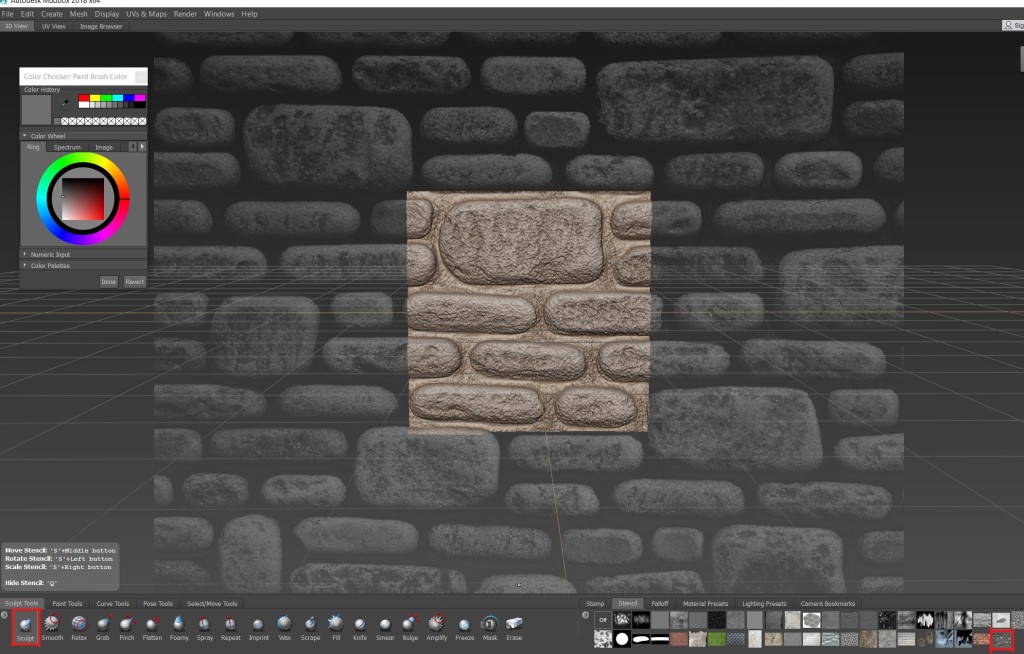
Pick any texture you like from google
Add the texture to stencil
Select the stencil and sculpt (shift+D to increase the resolution)
So if you guys have reached here successfully, pat yourself from here it gets slightly tricky
Hope you all know a little bit about passes, if not kindly check the above video couple of time
Go to paint projection for Diffuse pass, to get the cut out of the sculpted area(Note: dont create a diffuse map from texture, it needs to be precise that is why we are painting it here)
Afer you create diffuse pass in the tab, then in the kindly select color grey or anything inbetween black or white but not extreme on either side you can start to paint on the mesh and then export once finished
To export Diffuse and Normal map
Diffuse
Go to: File>Export All Paint Layers Below dialog box will open, kindly change the below Path Template to a suitable location.
Normal
Note: Dont try to paint Normal map
Go to: UVs & Maps>Extract texture maps Below dialog box will open, the ones which are highlighted are basic settings kindly set as per your requirement
Done till here congratulate yourselves, all the hard work is done
The DCC software is not mandatory as it is ony used for creating ambient occlusion in this scenario.
Crazy Bump
save Specular map from that
Open Specular map in Photosop and slightly paint randomly with black or dark grey that will be our Roughness map
and for the final compiling in unreal engine, watch the video very nicely explained.
I would recommend everyone to watch all the videos of Ben he was the guy who sold ShaderFX to max and maya so he has indepth knowledge on shaders.
I am even attaching the googledrive link for anyone who wants to download the maps and mudbox file
I have been interested in learning a game engine, and i finally started and created a particle effect just to visually motivate myself, as i am from rigging background i rarely get to taste the visual treat, hoping to get my skeletal mesh and try few more effects till then this is the output.
Well To be honest i’ve been reading a book and refering a series of tutorial well i just began watching the series, below are the links for the book and series
I’ll write a review of this book very soon as i have completed 70% of it, bloody good book i’ll elaborate that very soon
Below is the official unreal engine cascade(particles) playlist must watch for every aspiring fx artist who wants a basic understanding of realtime fx.
I would like to begin by introducing myself, Hi guys i am Blossom Ghuntla, from today onwards i’ll share my experience and learnings about 3d packages, engines etc what i think can help anyone who is interested in learning and growing as an artist, and help me also grow😊😊.